Shopify Themes

Increase Your Shopify Store Traffic: Understanding the Impact of SEO

Boost Your Shopify Store Traffic: The Role of SEO

Search Engine Optimization (SEO) is a crucial aspect of any e-commerce store, including Shopify stores. It involves optimizing various elements of your website to improve its ranking on search engines, such as Google, and drive more organic traffic to your site.

Here are some of the key ways SEO can drive traffic to your Shopify store:

1. Keyword optimization:

Identifying the right keywords to target is crucial for SEO success. By researching and targeting keywords that are relevant to your products and services, you can improve your website’s visibility in search results. Keyword optimization is the process of researching, selecting, and targeting specific keywords that are relevant to your products and services. These keywords are then used throughout your website, including in the page titles, meta descriptions, header tags, and content, to help search engines understand the topic of your website and improve its ranking in search results.

Here are some tips for effective keyword optimization:

Conduct keyword research:

Use tools such as Google Keyword Planner to research keywords that are relevant to your products and services and have high search volume.

Target long-tail keywords:

Long-tail keywords are more specific and targeted, and often have lower competition. This makes them easier to rank for, and can result in more targeted traffic to your site.
Use keywords in the right places: Use keywords in the page titles, meta descriptions, header tags, and content, but avoid keyword stuffing, as this can harm your website’s ranking.

Monitor keyword performance:

Use tools such as Google Analytics to monitor the performance of your keywords and make adjustments as needed.

Stay up-to-date with changes in keyword trends:

Keyword trends can change over time, so it’s important to regularly conduct keyword research and make adjustments as needed.

By effectively optimizing your website for keywords, you can improve your website’s ranking on search engines, attract more targeted traffic to your site, and ultimately drive more sales for your Shopify store

Related: How To Set Up A Featured And A Special Products | Shopify Themes

2. On-page optimization:

This involves optimizing various elements of your website, such as the title tags, meta descriptions, and header tags, to ensure that your website is optimized for search engines.

This includes optimizing the following elements:
Title tags: The title tag is the text that appears in the search engine results and is a crucial factor in determining the relevance of your website to a particular search query. Make sure your title tags accurately reflect the content of each page and include your target keywords.

Meta descriptions:

The meta description is a brief summary of the content of each page. It should be clear, concise, and include your target keywords. This can help improve the click-through rate of your website in search results.

Header tags:

Header tags, such as H1, H2, and H3, are used to structure the content of your website and make it easier for search engines to understand the hierarchy of your content. Make sure to use header tags appropriately and include your target keywords in the H1 tag.

URL structure:

The URL structure of your website should be clear and concise, and include your target keywords. This makes it easier for search engines to understand the relevance of each page to a particular search query.

Content:

The content of your website should be high-quality, relevant, and optimized for keywords. Make sure to include your target keywords in the content, but avoid keyword stuffing, as this can harm your website’s ranking.

By optimizing these elements of your website, you can improve its ranking on search engines, attract more targeted traffic to your site, and ultimately drive more sales for your Shopify store.

3. Content creation:

Creating high-quality, relevant content that is optimized for search engines can help you attract more organic traffic to your site. This can include blog posts, product descriptions, and other types of content that are optimized for keywords.

Here are some tips for effective content creation:

Identify your target audience:

Understanding your target audience is crucial in creating content that resonates with them. This can help you create content that is relevant, engaging, and optimized for keywords.

Choose the right topics:

Choose topics that are relevant to your products and services, and that have high search volume. Make sure the content is valuable and provides a unique perspective on the topic.

Optimize for keywords:

Make sure to include your target keywords in the content, but avoid keyword stuffing, as this can harm your website’s ranking. The content should be naturally written and optimized for both search engines and your target audience.

Use multimedia:

Multimedia, such as images and videos, can help make your content more engaging and improve the user experience.

Regularly publish new content:

Regularly publishing new, high-quality content can help keep your website fresh and improve its ranking on search engines.

By creating high-quality, relevant, and optimized content, you can improve your website’s ranking on search engines, attract more organic traffic to your site, and ultimately drive more sales for your Shopify store.

    Also Read: 8 Most Useful Artificial Intelligence Tools In 2022 – Webibazaar

4. Link building:

Building high-quality backlinks from other websites to your Shopify store can help improve your website’s ranking on search engines and drive more traffic to your site.

Here are some tips for effective link-building:

Create high-quality content:

High-quality, relevant, and optimized content can attract backlinks naturally. People will be more likely to link to your website if they find your content valuable and informative.

Reach out to other websites:

Reach out to other websites in your niche and ask if they would be interested in linking to your website. Make sure to provide them with a relevant and valuable reason for linking to your site.

Guest post on other websites:

Write a guest post for another website in your niche, and include a link back to your own website. This can help increase your visibility and attract backlinks from high-authority websites.

Participate in online communities:

Participate in online communities and forums related to your niche. This can help increase your visibility and attract backlinks from relevant websites.

Monitor your backlink profile:

Use tools such as Google Search Console to monitor your backlink profile and make sure you are acquiring high-quality backlinks from reputable websites.

By building high-quality backlinks, you can improve your website’s ranking on search engines, attract more organic traffic to your site, and ultimately drive more sales for your Shopify store.

Also Read: Elementor Review With Pros & Cons: Is It Really Good In 2023

5. Mobile optimization:

With the increasing use of mobile devices to access the internet, it’s important to ensure that your Shopify store is optimized for mobile devices. This includes making sure that your website is responsive and that it loads quickly on mobile devices.

Here are some tips for mobile optimization:

Responsive design:

Make sure that your website is responsive and adapts to different screen sizes and resolutions. This can provide a better user experience and help improve your website’s ranking on search engines.

Fast loading times:

Slow loading times can harm your website’s ranking on search engines and discourage mobile users from visiting your site. Use tools such as Google PageSpeed Insights to optimize your website’s loading times.

Mobile-friendly navigation:

Make sure that your navigation is intuitive and easy to use on mobile devices. This can help improve the user experience and keep mobile users engaged with your website.

Mobile-friendly content:

Make sure that your content is optimized for mobile devices, including images and videos. This can provide a better user experience and help improve your website’s ranking on search engines.

Mobile-friendly checkout process:

Ensure that the checkout process on your Shopify store is mobile-friendly and optimized for mobile devices. This can help improve the conversion rate of your site and drive more sales.

By optimizing your Shopify store for mobile devices, you can improve your website’s ranking on search engines, attract more mobile traffic to your site, and ultimately drive more sales for your Shopify store.

In conclusion, SEO is a critical component of driving traffic to your Shopify store. By optimizing your website for search engines, you can improve your website’s ranking and attract more organic traffic to your site.

More Blogs:

Top 10 Way To Local SEO Hacks – Guaranteed To Grow Your Traffic

White Hat SEO: Five Proven Ways To Rank Without Breaking Rule

Best Free Shopify Ecommerce Store Themes For Your online shops

How To Install The Theme To Your Store | Shopify Themes

Web Design

10 Best Free Web Design Courses and Tutorials

10 Free Web Design Courses and Tutorials for Beginners

Here are some step-by-step web design tutorials to help you get started:

Building a Simple Website:

This tutorial covers the basics of creating a website using HTML and CSS. It includes step-by-step instructions on how to create a webpage, add text and images, and create links.

Creating a Responsive Website:

This tutorial covers how to create a website that looks good on all devices, including desktops, tablets, and smartphones. It includes step-by-step instructions on how to use CSS media queries and grid systems to create a responsive layout.

Creating a Navigation Menu:

This tutorial covers how to create a navigation menu that allows visitors to easily navigate through your website. It includes step-by-step instructions on how to create a menu using HTML and CSS.

Adding Interactivity with JavaScript:

This tutorial covers how to add interactivity to your website using JavaScript. It includes step-by-step instructions on how to create basic scripts, such as a simple image slider, a form validation and more.

Creating a Blog Using a Content Management System (CMS):

This tutorial covers how to create a blog using a popular CMS such as WordPress, Joomla or Drupal. It includes step-by-step instructions on how to install and set up the CMS, create pages and posts, and customize the design of your blog.

Creating a Portfolio Website:

This tutorial covers how to create a portfolio website to showcase your work as a designer, developer, or artist. It includes step-by-step instructions on how to create a layout that highlights your best work, and how to make it mobile-friendly and responsive.

Creating an e-commerce Website:

This tutorial covers how to create a website that allows you to sell products or services online. It includes step-by-step instructions on how to create a layout that showcases your products, how to add a shopping cart and checkout system, and how to integrate with a payment gateway.

Creating a Landing Page:

This tutorial covers how to create a landing page that converts visitors into customers. It includes step-by-step instructions on how to create a layout that focuses on a specific product or service, how to use persuasive design elements, and how to create a compelling call to action.

Creating an Animated Website:

This tutorial covers adding animations to your website using CSS and JavaScript. It includes step-by-step instructions on how to create smooth scrolling effects, hover effects, and more to make your website more engaging and dynamic.

Creating a Website Using a Framework:

This tutorial covers how to create a website using popular frameworks such as Bootstrap, Foundation or Bulma. It includes step-by-step instructions on how to create a layout that is responsive and easy to customize, how to use pre-built components, and how to create a responsive navigation menu.

As you can see, there are many different ways to approach web design and many different types of websites you can create. You can find a lot of resources online to learn step by step, and also many tutorials available on different platforms like YouTube, Udemy, or Skillshare that you can use to learn.

Note: These tutorials are just examples, and there’s a lot of resources available online. Websites such as w3schools, freeCodeCamp, MDN and many more offer free tutorials on HTML, CSS, JavaScript and also on different frameworks and libraries.

  1. Web Design for Everybody (Basics of Web Development and Coding) from University of Michigan on Coursera
  2. Web Design for Web Developers from University of London on Coursera
  3. HTML, CSS, and JavaScript for Web Developers from Johns Hopkins University on Coursera
  4. Introduction to Web Development from W3C on edX
  5. Website Design Essentials from California Institute of the Arts on Coursera
  6. Web Design for Beginners: Real World Coding in HTML & CSS from Udemy
  7. Website Development Bootcamp from University of Hong Kong on Coursera
  8. Web Design for Everybody: HTML, CSS, and JavaScript from University of Illinois at Urbana-Champaign on Coursera
  9. Introduction to Web Design from California Institute of the Arts on Coursera
  10. Web Design Fundamentals from Google on Udacity

Please keep in mind that some of the courses might have a paid certificate option, but the course materials and lecture videos themselves are free to access.

Also Read: Elementor Review With Pros & Cons: Is It Really Good In 2023

Build a Random Password Generator in JavaScript

Here’s an example of how you can build a random password generator in JavaScript:
php
Copy code
<!DOCTYPE html> <html> <head> <title>Random Password Generator</title> </head> <body> <h1>Random Password Generator</h1> <p>Generated Password: <input type=”text” id=”password”></p> <button onclick=”generatePassword()”>Generate Password</button> <script> function generatePassword() { // Define a string of possible characters for the password const possibleCharacters = ‘ABCDEFGHIJKLMNOPQRSTUVWXYZabcdefghijklmnopqrstuvwxyz0123456789!@#$%^&*()_+-=’; let password = ”; // Use a loop to generate a random password of a specified length const passwordLength = 16; for (let i = 0; i < passwordLength; i++) { password += possibleCharacters.charAt(Math.floor(Math.random() * possibleCharacters.length)); } // Display the generated password document.getElementById(‘password’).value = password; } </script> </body> </html>
This code creates a simple HTML page with a button to generate a random password and an input field to display the generated password. When the button is clicked, the generatePassword function is called. The function defines a string of possible characters for the password, creates an empty string to store the generated password, and uses a loop to generate a random password of a specified length (in this case, 16 characters). The function then displays the generated password in the input field on the page.

Understand Usability Heuristics

Usability heuristics are a set of general principles for evaluating the user experience of a website or application. They help designers and developers ensure that their products are easy to use and meet the needs of their users. The following are the most commonly used usability heuristics:

Visibility of system status:

The system should always keep users informed about what is going on, through appropriate feedback within a reasonable time.

Match between the system and the real world:

The system should speak the users’ language, with words, phrases and concepts familiar to the user, rather than system-oriented terms. Follow real-world conventions, making information appear in a natural and logical order.

User control and freedom:

Users often choose system functions by mistake and will need a clearly marked “emergency exit” to leave the unwanted state without having to go through an extended dialogue. Support undo and redo.

Consistency and standards:

Users should not have to wonder whether different words, situations, or actions mean the same thing. Follow platform conventions.

Error prevention:

Even better than good error messages is a careful design which prevents a problem from occurring in the first place. Either eliminate error-prone conditions or check for them and present users with a confirmation option before they commit to the action.

Recognition rather than recall:

Minimize the user’s memory load by making objects, actions, and options visible. The user should not have to remember information from one part of the dialogue to another. Instructions for use of the system should be visible or easily retrievable whenever appropriate.

Flexibility and efficiency of use:

Accelerators — unseen by the novice user — may often speed up the interaction for the expert user such that the system can cater to both inexperienced and experienced users. Allow users to tailor frequent actions.

Aesthetic and minimalist design:

Dialogues should not contain information which is irrelevant or rarely needed. Every extra unit of information in a dialogue competes with the relevant units of information and diminishes their relative visibility.
Help users recognize, diagnose, and recover from errors: Error messages should be expressed in plain language (no codes), precisely indicate the problem, and constructively suggest a solution.

Help and documentation:

Even though it is better if the system can be used without documentation, it may be necessary to provide help and documentation. Any such information should be easy to search, focused on the user’s task, list concrete steps to be carried out, and not be too large.

By following these heuristics, designers and developers can ensure that their products are easy to use and meet the needs of their users.

Also Read: White Hat SEO: Five Proven Ways To Rank Without Breaking Rule

Build a Website With Squarespace

Here is a step-by-step guide on how to build a website using Squarespace:

Create an account:

Go to Squarespace.com and sign up for a new account. Choose the pricing plan that fits your needs and enter your billing information.

Choose a template:

Squarespace offers a range of templates that you can choose from. Select the template that best fits the design and functionality of your website.

Customize your template:

Use the drag-and-drop editor to customize your template with your own content and design elements. You can add pages, add images and videos, and change the layout and style of your website.

Set up your navigation:

Set up the main navigation for your website, including the order of your pages and the labels for each page.

Add your content:

Add your own text, images, and other content to your website pages. You can use the built-in editor to format your text, add images and videos, and include links to other pages or external websites.

Set up your domain:

If you want to use your own custom domain, you can set it up in the settings section of your Squarespace account. You can either transfer an existing domain or purchase a new one directly from Squarespace.

Publish your website:

Once you have finished designing and adding content to your website, you can publish it by clicking the “Publish” button in the settings section. Your website will now be live and accessible to the public.

Note: Squarespace offers a wide range of features and tools to help you build and customize your website, including e-commerce capabilities, SEO optimization, and integrations with third-party tools. Explore the Squarespace Help Center for more information on how to use these features.

More Blogs

Best Cheap WordPress Themes For ECommerce Store

How To Do SEO In A Projected Budget?

Make Your Free WordPress Themes Look Like A Demo Preview

Wordpress Theme

Free Amazon Affiliate WordPress Plugins for Your WordPress Website

Boost Your Affiliate Earnings with These Free Amazon Affiliate WordPress Plugins

There are several free Amazon Affiliate WordPress plugins available for use on your WordPress website. Some popular options include:

Amazon Associates Link Builder:

This plugin allows you to easily create affiliate links for products on Amazon, directly from your WordPress post editor.

Amazon Link Engine:

This plugin automatically converts keywords in your content into affiliate links for Amazon products.

EasyAzon:

This plugin offers a variety of features for Amazon affiliates, including the ability to create affiliate links, add product information and images to your posts, and manage your affiliate links in one place.

Amazon Associates Link Localizer:

This plugin allows you to easily redirect users to the Amazon store for their country, ensuring that they see prices and products in their local currency.

Amazon Associates Link Builder for Gutenberg :

This plugin allows you to easily create affiliate links for products on Amazon, directly from your WordPress post editor using the Gutenberg Block editor.

It’s always a good idea to read the reviews and check the compatibility of the plugin before installing and activating it on your website.

Making some money with the best Amazon affiliate WordPress plugins

There are several ways to make money with the best Amazon affiliate WordPress plugins. Here are a few strategies to consider:

  • Create product review posts: Use your plugin to add affiliate links to specific products within your content, then write detailed, honest reviews of those products. This can be a great way to drive sales and earn commissions.
  • Use affiliate link localization: By redirecting users to the Amazon store for their country, you can ensure that they see prices and products in their local currency, increasing the likelihood of a sale.
  • Create comparison posts: Create a post that compares several similar products, then use your plugin to add affiliate links to each one. This can be a great way to introduce users to a variety of options and increase the chances of a sale.
  • Monetize your blog: By adding affiliate links to your blog, you can earn money for every sale made through your links.
  • Promote affiliate links on social media: Share your affiliate links on social media platforms like Facebook, Twitter, and Instagram to reach a wider audience and drive more sales.

It’s important to note that you should always disclose your affiliate links in compliance with the regulations and guidelines of the Amazon affiliate program and the FTC.

Also Read: WordPress Bakery Website Templates For Cake Business

Installing the best Amazon affiliate WordPress plugin

Installing the best Amazon affiliate WordPress plugin is a straightforward process that can typically be completed in just a few steps. Here’s a general guide on how to install an Amazon affiliate plugin on your WordPress website:

  • Log in to your WordPress dashboard and navigate to the “Plugins” menu.
  • Click on “Add New” and search for the plugin you want to install.
  • Once you find the plugin, click on “Install Now” and wait for the installation to complete.
  • Once the plugin is installed, click on “Activate” to start using it on your website.
  • Some plugin may require additional setup steps, such as creating an Amazon Associates account and linking it with the plugin. Therefore you should read the documentation for the plugin you choose to use.
  • Once the setup is complete, you can start using the plugin to create affiliate links, add product information, and more.

It’s always a good idea to back up your website before installing any plugin, in case something goes wrong during the installation process.

Keep in mind that different plugins may have different installation and setup processes, so you should always refer to the documentation provided by the plugin developer for specific instructions.

Also Read: 5 One Page Consulting Website Templates For Startup

20 Free Amazon Affiliate WordPress Plugins

There are several free Amazon affiliate WordPress plugins available for use on your WordPress website. Here are 20 popular options:

  1. Amazon Associates Link Builder
  2. Amazon Link Engine
  3. EasyAzon
  4. Amazon Associates Link Localizer
  5. Amazon Associates Link Builder for Gutenberg
  6. Amazon Product in a Post
  7. Amazon Product Advertising API
  8. Amazon Affiliates for WooCommerce
  9. Amazon Associates Link Shortener
  10. Amazon Product Advertising for WordPress
  11. Amazon Post
  12. Amazon Product Advertising for WordPress
  13. Amazon Associates Link Builder
  14. Amazon Product Advertising API
  15. Amazon Affiliates for WooCommerce
  16. Amazon Associates Link Shortener
  17. Amazon Product Advertising for WordPress
  18. Amazon Post
  19. Amazon Product Advertising for WordPress
  20. Amazon Associates Link Builder

More Blogs

Best Cheap WordPress Themes For ECommerce Store

Make Your Free WordPress Themes Look Like A Demo Preview

6 Fascinating Black And White WordPress Themes In 2023

Wordpress Theme

20 Best Free and Premium Gutenberg Plugins for WordPress

Here are some popular free and premium WP Gutenberg plugins that are highly rated by users:

Free:

  1. Advanced Gutenberg
  2. Stackable – Gutenberg Blocks
  3. CoBlocks
  4. Gutentor
  5. Block Gallery
  6. Atomic Blocks
  7. Advanced Custom Fields
  8. Block Lab
  9. Post Blocks
  10. WPForms
  11. Gutenberg Blocks for WordPress
  12. WPForms Lite
  13. Advanced Gutenberg Blocks
  14. Widget for Gutenberg
  15. Gutenberg Blocks for All
  16. Block Unit Test
  17. Gutenberg Blocks for Blogs
  18. Gutenberg Blocks for WooCommerce
  19. WordPress Editor Blocks
  20. Block Builder

Premium:

  1. Beaver Builder
  2. Elementor
  3. Divi Builder
  4. Thrive Architect
  5. Visual Composer
  6. WP Bakery Page Builder
  7. Page Builder Framework
  8. Oxygen
  9. Brizy
  10. SiteOrigin Page Builder
  11. Themify Builder
  12. Visual Composer Website Builder
  13. Ultimatum
  14. Fusion Builder
  15. Page Builder by SiteOrigin
  16. The Divi Builder
  17. Page Builder Sandwich
  18. Beaver Builder Pro
  19. Cornerstone Pro
  20. Page Builder Pro

What is Gutenberg?

Gutenberg is the new WordPress editor that replaces the classic editor with a block-based editing system. It was named after Johannes Gutenberg, the inventor of the printing press, as it represents a major step forward in the way content is created and edited in WordPress. With Gutenberg, instead of working with one single text box, users can now add and arrange blocks of different types of content, such as text, images, videos, and more, in a more visual and intuitive way. This allows for greater flexibility and creativity when designing and laying out pages and posts. Gutenberg also includes a wide range of built-in blocks, including basic text, headings, images, galleries, and more, and also allows for easy addition of custom blocks through the use of plugins.

Check out:- Digital Marketing Agency WordPress Themes, Marketing Agency WordPress Themes, Advertising Agency PrestaShop Themes

How to use the Gutenberg editor

Using the Gutenberg editor is relatively simple, but it may take some time to get used to the new block-based layout. Here are the basic steps to using the editor:

  • Log in to the WordPress dashboard and create or edit a post or page.
  • In the editor, you will see a series of blocks that you can add, move and arrange to create your desired layout.
  • To add a new block, click on the “+” icon in the top left corner of the editor. You can also use the “Enter” key to create a new block after the current one.
  • Once a block is added, you can click on it to edit its content or change its settings.
  • You can also use the block navigation menu on the right-hand side of the editor to move, copy, and delete blocks.
  • To change the layout of a block, you can use the options available in the block settings.
  • To save your changes, click on the “Publish” button on the top right corner of the editor.

Keep in mind that you can also add custom blocks using plugins which can be found on the WordPress repository.

The process of adding and using them may vary, it’s recommended to read the documentation or instructions provided by the plugin developer.

Also Read: 7 Best Survey WordPress Plugins For Your Blogs In 2022

Why do you need Gutenberg plugins?

Gutenberg plugins are necessary because they add additional functionality and customization options to the native blocks that come with the Gutenberg editor. Here are a few reasons why you may need Gutenberg plugins:

Additional blocks:

Some plugins offer additional blocks that are not available in the native editor, such as pricing tables, testimonials, and more. This can be useful for creating more complex layouts and designs.

Customization options:

Some plugins offer additional customization options for native blocks, such as different colour schemes, font sizes, and more. This can be useful for creating a more unique and personalized look for your website.
Enhanced functionality: Some plugins offer enhanced functionality for the native blocks, such as the ability to create forms, galleries, and more. This can be useful for adding more interactive elements to your website.

Compatibility:

Some plugins are developed to work with specific themes or other plugins. This can be useful for ensuring that your website remains compatible with other elements of your website.

Third-party services integration:

Some plugins provide integration with third-party services like Google Maps, YouTube, and more.
It’s important to note that not all plugins are created equal, so it’s recommended to research and test different plugins before implementing them on a live website, as they can have a significant impact on the site’s functionality and performance.

Conclusions

In conclusion, Gutenberg is a new WordPress editor that replaces the classic editor with a block-based editing system, allowing for greater flexibility and creativity when designing and laying out pages and posts. Gutenberg plugins add additional functionality and customization options to the native blocks that come with the Gutenberg editor. It can provide additional blocks, customization options, enhanced functionality, compatibility and third-party services integration. It’s important to research and tests different plugins before implementing them on a live website, as they can have a significant impact on the site’s functionality and performance. It’s also important to keep in mind that not all plugins are created equal and that it is recommended to read the documentation or instructions provided by the plugin developer.

More Blogs:

Best Free Vs Paid WordPress Themes – Ultimate Guide 2022

Fantastic E-Commerce WordPress Themes That Can Offer Delightful Experience To Your Customers

Excellent Product Showcase WordPress Themes That Captivate Audience

Prestashop Themes
  • How To Manage And Enable SEO & URLs In PrestaShop 1.7X Version – Webibazaar TemplatesWebibazaarHow To Manage And Enable SEO & URLs In PrestaShop 1.7X Version - Webibazaar Templates
    SEO has become an integral part of promoting and marketing a website online. Search engine optimization is improving the site to get more traffic from search engines. PrestaShop Themes provide the option to improve your website’s SEO. A friendly URL is important. Google search engines identify friendly URLs rather than unfriendly ones. Search engine optimization also ...
  • Installation Of PrestaShop 1.7.X On LocalHost [Step by Step Tutorial]WebibazaarInstallation Of PrestaShop 1.7.X On LocalHost [Step by Step Tutorial]
    The Prestashop theme is the Open-source eCommerce Themes Platform. This platform provides a stats-driven dashboard so the user can manage their site in the way they like. Webibazaar Templates provide many eCommerce Web design Themes platforms on Best Prestashop themes, Responsive BigCommerce themes, Shopify themes, OpenCart themes, WooCommerce themes. Here we will show you how to install the ...
  • How To Add Google Analytics For Your ECommerce PrestaShop Theme 1.7WebibazaarHow To Add Google Analytics For Your ECommerce PrestaShop Theme 1.7
    Google Analytics is one type of Google Service that tracks and Report Website Traffic. You can analyze your website traffic behavior. PrestaShop theme is Provide module Especially for Google Analytics. However, You have to only install the Module and add a tracking Code For use. It is very easy to install and use this module. Webibazaar Templates ...
Prestashop-2

Opencart Themes
  • Best OpenCart eCommerce Responsive Templates – Webibazaar TemplatesWebibazaarBest OpenCart eCommerce Responsive Templates - Webibazaar Templates
    Webibazaar provides you Best OpenCart Themes. You can select any templates and start an eCommerce Themes Business. OpenCart Templates included lots of extensions, modules and add a banner option. It has many articles and documents. It is also used for creating multilanguage ECommerce Website Templates or websites. Features of OpenCart Template: 1. Shopping Cart – Main use of shopping ...
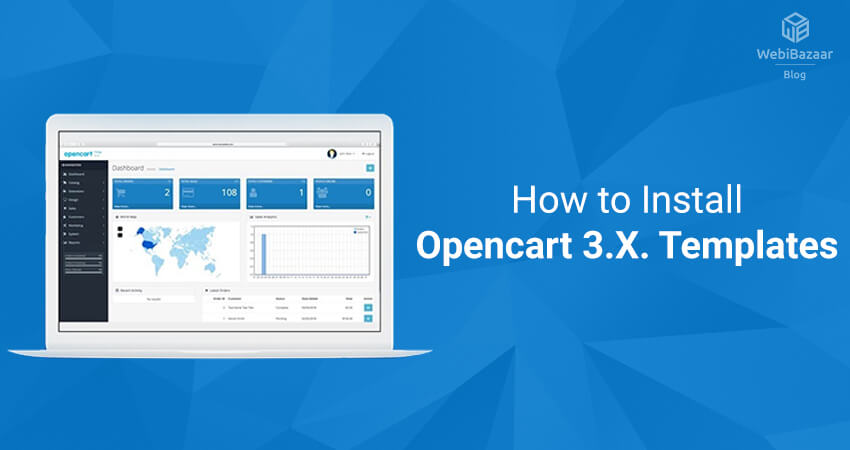
  • How To Install OpenCart 3.X Themes Over The Existing Store – Webibazaar TemplatesWebibazaarHow To Install OpenCart 3.X Themes Over The Existing Store - Webibazaar Templates
    Install OpenCart Themes enable you to customize the look of your website. To install a new theme in OpenCart, first, you need to install OpenCart on your site. Follow the below step to Install OpenCart Templates. Installation of OpenCart Templates: There are two ways to install a Theme: For the Installation of OpenCart, we have to follow the ...
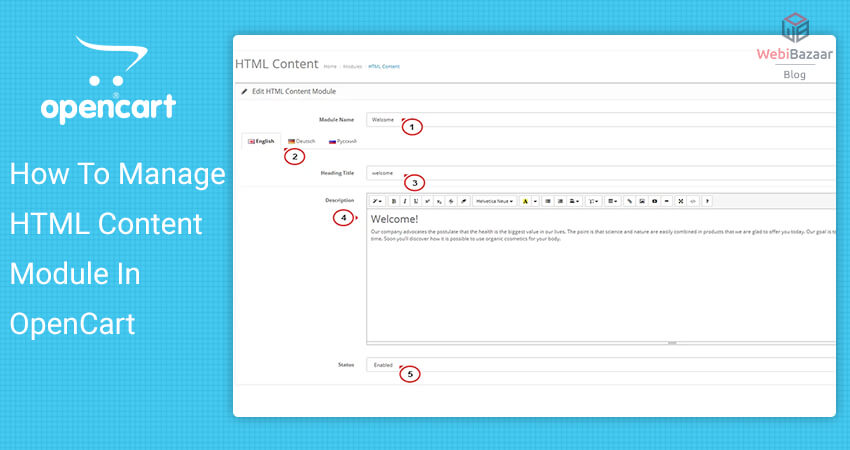
  • How To Manage HTML Content Module In OpenCart – Webibazaar TemplatesWebibazaarHow To Manage HTML Content Module In OpenCart - Webibazaar Templates
    HTML content module provides the functionality to add text, images, video. You can also change color, size, the font in this block. There are a few steps for How to use the HTML Content Module in OpenCart Themes. Let’s start it and follow these simple steps. Install and edit HTML Content module To use the HTML Content ...
Big-Discount

Recent Comments