How To Change The Default Products Listing View In Your Store | Shopify Themes

Shopify is an amazing eCommerce platform to sell your products online. Customers can easily view the catalog with products and order it in less time with a great shopping experience.

The way your product listing looks can play a great role, so that’s the reason you want to change the default product listing view from the grid to list, to do it, follow the steps as shown below :

NOTE: This tutorial is helpful to only themes that have sections, you can check if your theme has them in the Online store Themes Customize. If you find content inside the sections tab, this guide is for you.

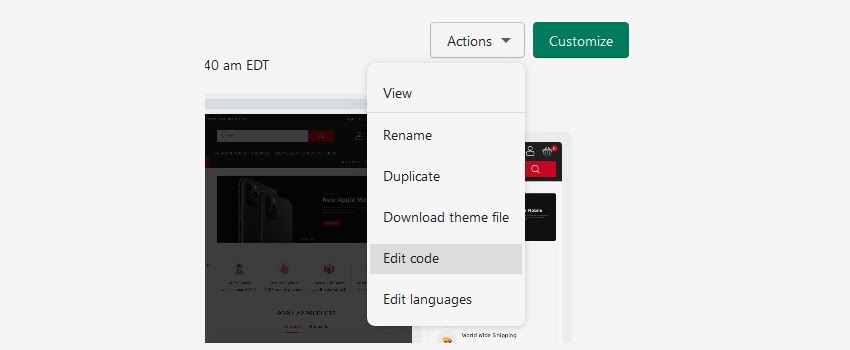
1. Open your Shopify admin panel and go to the Online store Themes Actions Edit code.

change-default-product-yourstore1

2. In the Sections folder, go on the left sidebar and select the template-collection.liquid file and create a backup of it in case if something goes wrong.

3. Find this part of the code, approx on line 110 :

  1. <ul class=”product_view”>
  2. <li id=”view_grid” data-view=”grid” class=”active”>
  3. <i class=”fa fa-th” aria-hidden=”true”></i>
  4. </li>
  5.        <li id=”view_list” data-view=”list”>
  6. <i class=”fa fa-th-list” aria-hidden=”true”></i>
  7. </li>
  8. </ul>

4. Remove the class=“active” from the first <li> and add it to the second one so it will look like this :

  1. <ul class=”product_view”>
  2. <li id=”view_grid” data-view=”grid”>
  3. <i class=”fa fa-th” aria-hidden=”true”></i>
  4. </li>
  5.       <li id=”view_list” data-view=”list” class=”active”>
  6. <i class=”fa fa-th-list” aria-hidden=”true”></i>
  7. </li>
  8. </ul>

5. After doing it, find this part of the code, approx on line 345 :

  1. {% javascript %}
  2. jQuery (document) .ready(function($) {
  3. // PRODUCTS VIEW GRID/LIST
  4. if ( typeof $.cookie(‘productSortView’) == ‘undefined’ ) {
  5. $.cookie(‘productSortView’, ‘grid’, {path: ‘/’});
  6. }
  7. else if ( $.cookie(‘productSortView’) == ‘list’ ) {
  8. $(‘#view_grid’).removeClass(‘active’);
  9. $(‘#view_list’).addClass(‘active’);

And replace it with this code :

  1. {% javascript %}
  2. jQuery (document) .ready(function($) {
  3. // PRODUCTS VIEW GRID/LIST
  4. if ( typeof $.cookie(‘productSortView’) == ‘undefined’ ) {
  5. $.cookie(‘productSortView’, ‘grid’, {path: ‘/’});
  6. }
  7. else if ( $.cookie(‘productSortView’) == ‘grid’ ) {
  8. $(‘#view_list’).removeClass(‘active’);
  9. $(‘#view_grid’).addClass(‘active’);

6. Save and refresh the page to see the changes you made.

Hope this tutorial will be helpful to you!

Related Tutorials For Shopify :

How To Manage Pages | Shopify Themes

How To Find & Edit Any Text | Shopify Themes

Leave a comment